Garbage Collection in PHP – Amazing feature

Last few week i worked on data scrapping projects, million of pages need to scrap and later insertion into database. cron jobs were set to process these records and were running for many days. memory management become critical for that project.

In PHP we have two most famous ways to free memory after job is done, set our variables to NULL or free using unset($var). i was unaware of any other way to free memory. i got problems when we run crons, memory goes higher after each iteration on Server and i was unable to control.

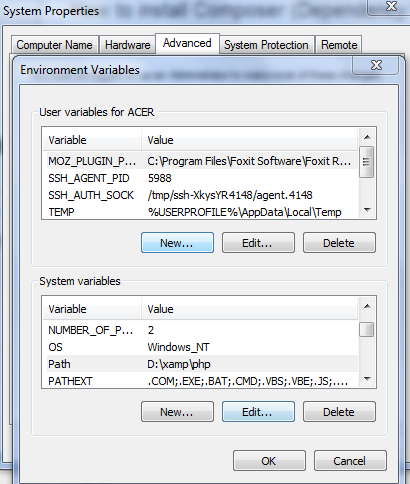
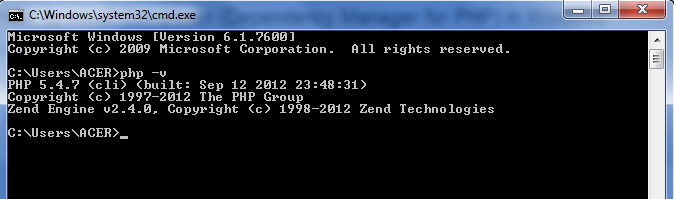
Another amazing behavior i observed and i want to share, that in Windows(on my localhost) when program run, program memory goes higher but at the end of iteration due to unset of variable and objects, it return to previous position. I was using memory_get_usage() to get stat and echoed at each iteration. but Linux server was doing different job memory never returned back and get higher after each iteration. even setting ini memory limit to -1 did no trick.

At the end we were thinking of purchasing more RAM to run these Cron jobs successfully. but that time these few lines did the trick I never thought.

//Memory cleanup for long-running scripts.
gc_enable(); // Enable Garbage Collector
var_dump(gc_enabled()); // true
var_dump(gc_collect_cycles()); // # of elements cleaned up
gc_disable(); // Disable Garbage Collector

This new Garbage Collection (also known as GC) mechanism is part of PHP 5.3 and can do amazing job when you are on long running script. gc_collect_cycles() will give you count for garbage cleanups. This script will not get you down due to memory shorting. Happy coding!

How to use Putty for SSH and Telnet client

You want to make secure SSH connection to server, sure you need a client. here i am talking about Putty. PuTTY is an SSH and telnet client, developed originally for the Windows platform. PuTTY is open source software that is available with source code and is developed and supported by a group of volunteers. There a two ways to connect with server using Putty: 1) Long way (which most people use, i don’t) 2) Short way (Persistent connection)

1) Long way

  • First download putty.
  • Don’t need to install, just double click screen will appear.
  • select protocol Enter ‘yourdomain.com’ in the field for ‘Host Name (or IP address)’ and select ‘SSH’ as Protocol and simply press open button.
  • Accept host key If this is the first time. popup will appear. if you press ‘Yes’ PuTTY will store the key and not ask you this question again.
  • Enter username and password after this. import thing password will not appear when enter keywords.

2) Short way

  • You already have downloaded the Putty, just create shortcut of it.
  • Rename it, right click the shortcut and open properties.
  • In the ‘Target’ field add “D:\putty.exe username@hostname/”IP address” -pw Your-password” and Press ‘OK’.
  • Every time you need to connect, open up  this shortcut. this will create a persistent connection with  server.

I prefer short way, it fast and create persistent connection.

Check PHP Code Performance and stdClass using InfiniteIterator

Following code is written using stdClass and PHP iterator “InfiniteIterator”

$start_time = microtime(true);

$std = new stdClass();
$std->first = "first";
$std->second = "second";
$std->third = "third";

$iterator = new InfiniteIterator(new ArrayIterator($std));
foreach ( new LimitIterator($iterator, 0, 1400000) as $value ) {
 print($value . PHP_EOL);
}

$end_time = microtime(true);
print $end_time - $start_time . " Sec" . "<br>";

And this code wrap between microtime() function to checkout the time consumed for this operation from start to end. stdClass class object hold three dynamic variable which we assign at the run time, then we pass the stdClass object to Itrerator “ArrayIterator” and then to “InfiniteIterator”. using foreach loop we are printing 1400000 values by assigning the object of InfiniteIterator to LimitIterator. if we will not use “LimitIterator”, loop will not end.

stdClass is php’s generic empty class, It is useful for anonymous objects, dynamic properties, etc.

When you run this code, your browser will stop working for few second until LimitIterator loop will end. at then end of these all printed values you will time consumed by this code. you can change parameter for LimitIterator to check variable amount of printed values and check the time.

How to install Composer (Dependency Manager for PHP) in Windows

Installation of Composer on Windows(XP, 7, 8) is easy, its only take few steps.

What is Composer? it is a dependency manager tracking local dependencies of your projects and libraries. get it here. It allows you to declare the dependent libraries your project needs and it will install them in your project for you.

I assume you have xampp installed, you can get latest version from here.

Step 1) First step is to make you enable run PHP commands on Command prompt. so let the CMD(Command prompt) know where is your php.exe exist. In my case I have xampp installed in D:/ drive. so it is D:\xampp\php. copy this path.

Next right click on My Computer, then click on Advanced System Settings, under Advance tab you will see Environment variables button. click on that a dialog box will pop up like bellow.

composer installation


Edit path variable and set it to D:\xampp\php. make sure you put this at the end of path string. its actually already have few paths, which are necessary to run other commands in windows.

Now check it works? open new command prompt window and run “php -v” command, if everything goes fine it should return something like bellow.

composer installation CMD

Step 2) Open your php.ini file by locating directory ”˜D:\xampp\php\ and search for “pgsql” and Disable the extension by placing a semicolon in the beginning of the line.

extension=php_pgsql.dll

also enable SSL extension by un-commenting this line. this will help in download composer setup files.

extension=php_openssl.dll

Step 3)  Finally now by running following command you can download composer to your environment. locate to folder where you want to install composer. like ”˜D:\xampp\php\.

php -r "eval('?>'.file_get_contents('https://getcomposer.org/installer'))";

This will download and install Composer within less than a minute.

Now you can create a composer.bat file, C:\xampp\php\composer.bat and include the following code:

@ECHO OFF
SET SUBDIR=%~dp0
php %SUBDIR%\composer.phar %*

This allows you to run the command “composer” anywhere using command prompt.

You can use composer with any project directory which is set to use composer by using Command prompt run following commands in that directory.

D:\xampp\htdocs\zend> php composer.phar self-update
D:\xampp\htdocs\zend> php composer.phar install

Let say you want to install Yii2 development version with basic application using composer.

D:\xamp\htdocs> composer create-project --prefer-dist --stability=dev yiisoft/yii
2-app-basic yii2-basic

It will download yii2 development version including its dependencies. see how faster it is.

installing yii2 using composer

Composer saves time and making your life easier, isn’t it?